Search
Items tagged with: FreeSoftWear
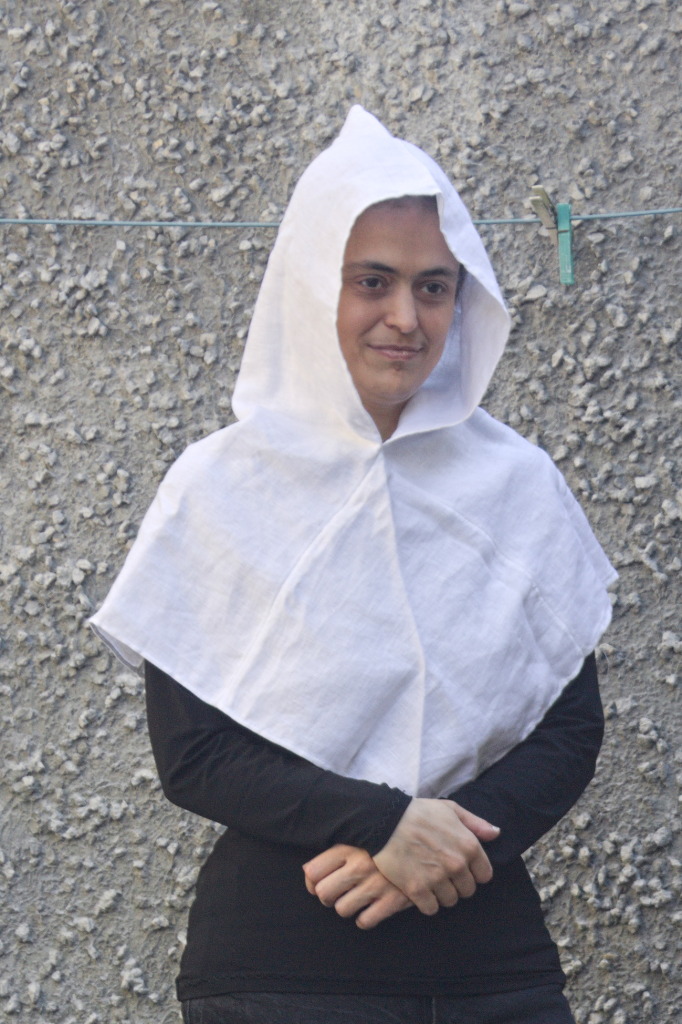
Two Linen Hoods
Posted on September 11, 2024
Tags: madeof:atoms, craft:sewing, FreeSoftWear
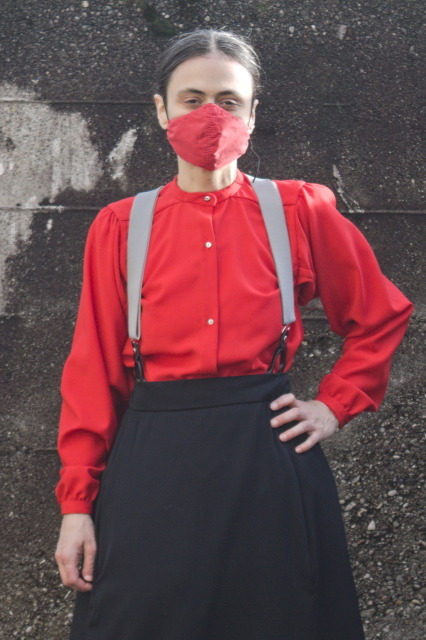
I’ve been influenced again into feeling the need for a garment.
It was again a case of multiple sources conspiring in the same direction for unrelated reasons, but I decided I absolutely needed a linen hood, made from the heavy white linen I knew I had in my stash.
Why? I don’t know. I do like the feeling of wearing a hood, and the white linen should give a decent protection from the sun, but I don’t know how often I’m going to wear these instead of just a hat. On the other hand the linen was already there and I needed something small to sew.
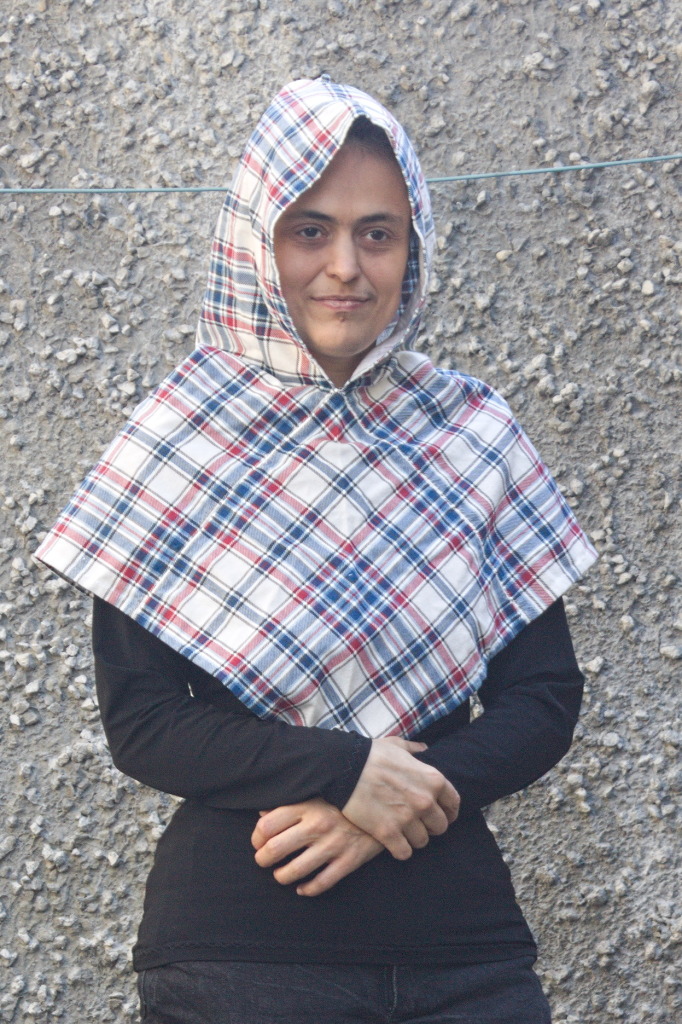
My first idea was to make a square hood: some time ago I had already made one out of some leftovers of duvet cover, vaguely inspired by theS , because I have a long-term plan of making one a bit more from scratch1.
I like the fact that this pattern is completely made out of squares and rectangles, and while the flannel one is quite fitting, as suitable for a warm garment, I felt that by making it just a cm or two wider it would have worked nicely for a warm weather one, and indeed it did.
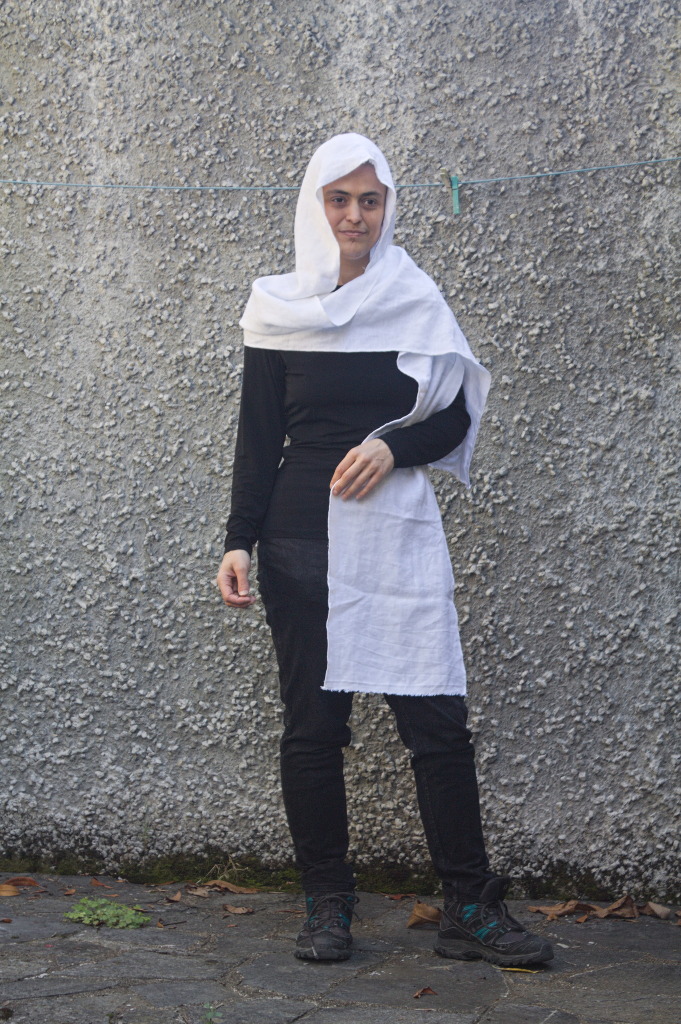
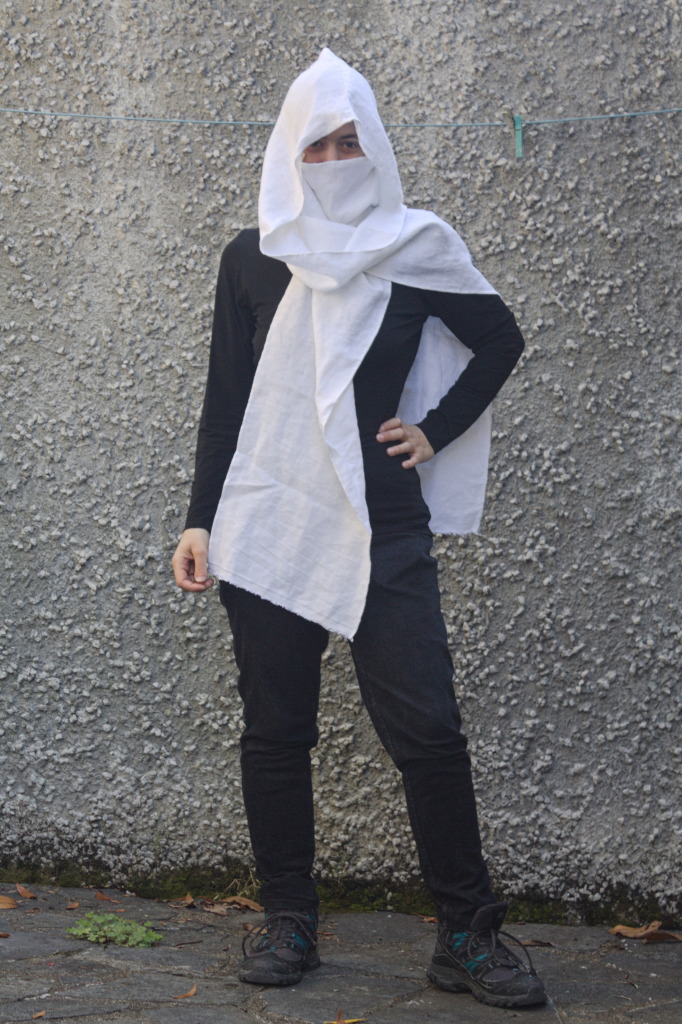
Except, before I even started on the square hood, I started to think that the same square top would also be good for a hood-scarf, one of those long flowy garments that sit on the head, wrap around the neck and fall down, moving with the wind and the movements of the person.
Because, let’s be honest. worn in a way that look like a veil they feel nice, it’s true. But with the help of a couple of pins then you can do this.
And no, I’ve never played that game2, and I’m not even 100% sure what it is about, other than killing people, climbing buildings and petting cats3, but that’s not really an issue when making a bit of casual cosplay of something, right?
Anyway, should anybody feel the need to make themselves a hood or ten, the patterns have been released as usual as #FreeSoftWear: square hoodand hood scarf.
- I’m not going to raise the sheep :D I’m actually not even going to wash and comb the wool, I’ll start from the step just after those :D↩︎
- because proprietary software, because somewhat underpowered computers and other related reasons that are somewhat incidental to the game itself.↩︎
- at least two out of three things that make it look like a perfectly enjoyable activity.↩︎
https://blog.trueelena.org/blog/2024/09/11-two_linen_hoods/index.html
White heavy linen - SARTOR BOHEMIA
A heavy fabric in a classic plain weave, made of natural linen in white, 7 oz. Sturdy and quite stiff, our heavy linen works well in skirts, trousers, and jackets, as well as for curtains and pillowcases.www.sartorbohemia.com

Elastic Neck Top Two: MOAR Ruffles
Posted on March 9, 2024
Tags: madeof:atoms, craft:sewing, FreeSoftWear
After making my Elastic Neck TopI knew I wanted to make another one less constrained by the amount of available fabric.
I had a big cut of white cotton voile, I bought some more swimsuit elastic, and I also had a spool of n°100 sewing cotton, but then I postponed the project for a while I was working on other things.
Then FOSDEM 2024 arrived, I was going to remote it, and I was working on my Augusta Stays, but I knew that in the middle of FOSDEM I risked getting to the stage where I needed to leave the computer to try the stays on: not something really compatible with the frenetic pace of a FOSDEM weekend, even one spent at home.
I needed a backup project1, and this was perfect: I already had everything I needed, the pattern and instructions were already on my site (so I didn’t need to take pictures while working), and it was mostly a lot of straight seams, perfect while watching conference videos.
So, on the Friday before FOSDEM I cut all of the pieces, then spent three quarters of FOSDEM on the stays, and when I reached the point where I needed to stop for a fit test I started on the top.
Like the first one, everything was sewn by hand, and one week after I had started everything was assembled, except for the casings for the elastic at the neck and cuffs, which required about 10 km of sewing, and even if it was just a running stitch it made me want to reconsider my lifestyle choices a few times: there was really no reason for me not to do just those seams by machine in a few minutes.
Instead I kept sewing by hand whenever I had time for it, and on the next weekend it was ready. We had a rare day of sun during the weekend, so I wore my thermal underwear, some other layer, a scarf around my neck, and went outside with my SO to have a batch of pictures taken (those in the jeans posts, and others for a post I haven’t written yet. Have I mentioned I have a backlog?).
And then the top went into the wardrobe, and it will come out again when the weather will be a bit warmer. Or maybe it will be used under the Augusta Stays, since I don’t have a 1700 chemise yet, but that requires actually finishing them.
The pattern for this project was already online, of course, but I’ve added a picture of the casing to the relevant section, and everything is as usual #FreeSoftWear.
- yes, I could have worked on some knitting WIP, but lately I’m more in a sewing mood.↩︎
https://blog.trueelena.org/blog/2024/03/09-elastic_neck_top_two_moar_ruffles/index.html
Augusta Stays 1775-1789
The Augusta Stays are the perfect foundation to any late 18th century wardrobe. Choose between detailed instructions on how to make the stays with period accurate materials and construction methods, or equally detailed instructions on making a simpli…Scroop Patterns

Jeans, step one
Posted on February 19, 2024
Tags: madeof:atoms, craft:sewing, FreeSoftWear
CW for body size change mentions
Just like the corset, I also needed a new pair of jeans.
Back when my body size changed drastically of course my jeans no longer fit. While I was waiting for my size to stabilize I kept wearing them with a somewhat tight belt, but it was ugly and somewhat uncomfortable.
When I had stopped changing a lot I tried to buy new ones in the same model, and found out that I was too thin for the menswear jeans of that shop. I could have gone back to wearing women’s jeans, but I didn’t want to have to deal with the crappy fabric and short pockets, so I basically spent a few years wearing mostly skirts, and oversized jeans when I really needed trousers.
Meanwhile, I had drafted a jeans pattern for my SO, which we had planned to make in technical fabric, but ended up being made in a cotton-wool mystery mix for winter and in linen-cotton for summer, and the technical fabric version was no longer needed (yay for natural fibres!)
It was clear what the solution to my jeans problems would have been, I just had to stop getting distracted by other projects and draft a new pattern using a womanswear block instead of a menswear one.
Which, in January 2024 I finally did, and I believe it took a bit less time than the previous one, even if it had all of the same fiddly pieces.
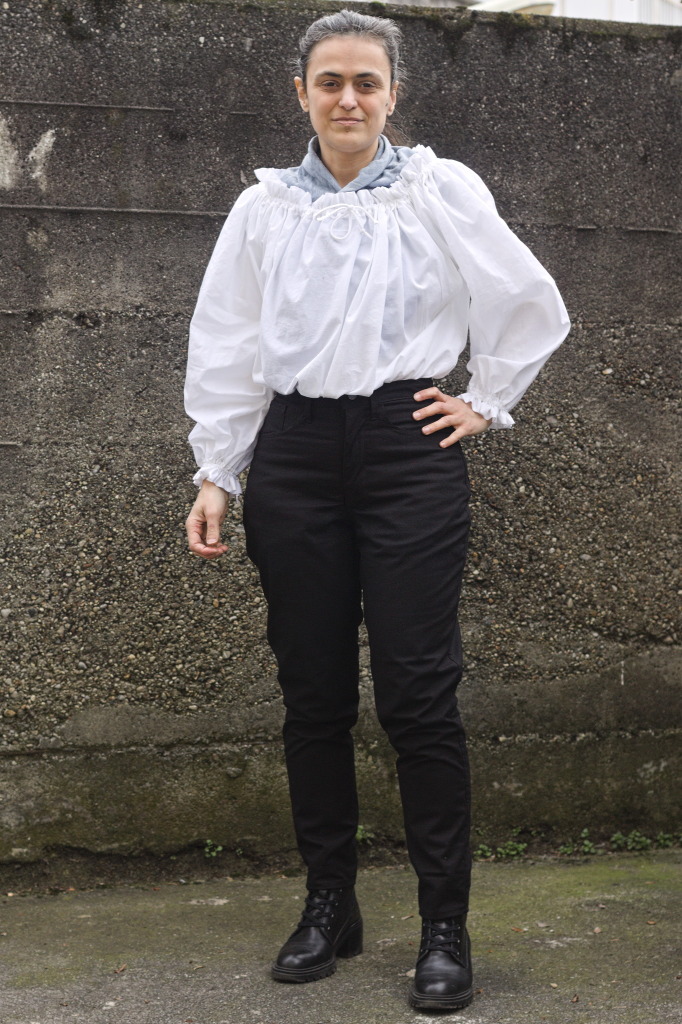
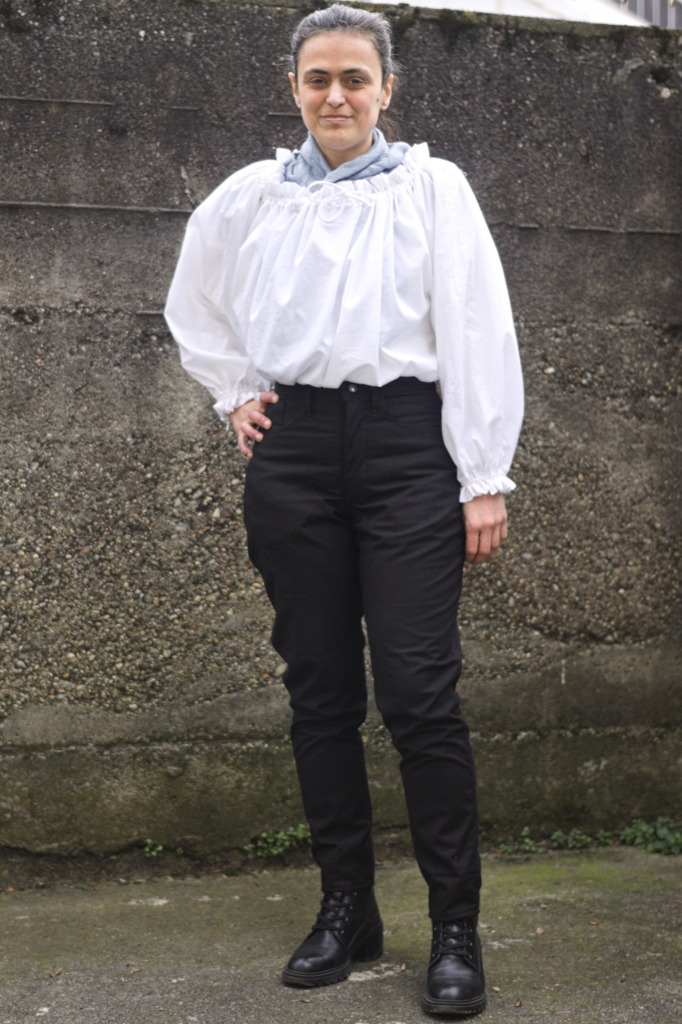
I already had a cut of the same cotton-linen I had used for my SO, except in black, and used it to make the pair this post is about.
The parametric pattern is of course online, as #FreeSoftWear, at the usual place. This time it was faster, since I didn’t have to write step-by-step instructions, as they are exactly the same as the other pattern.
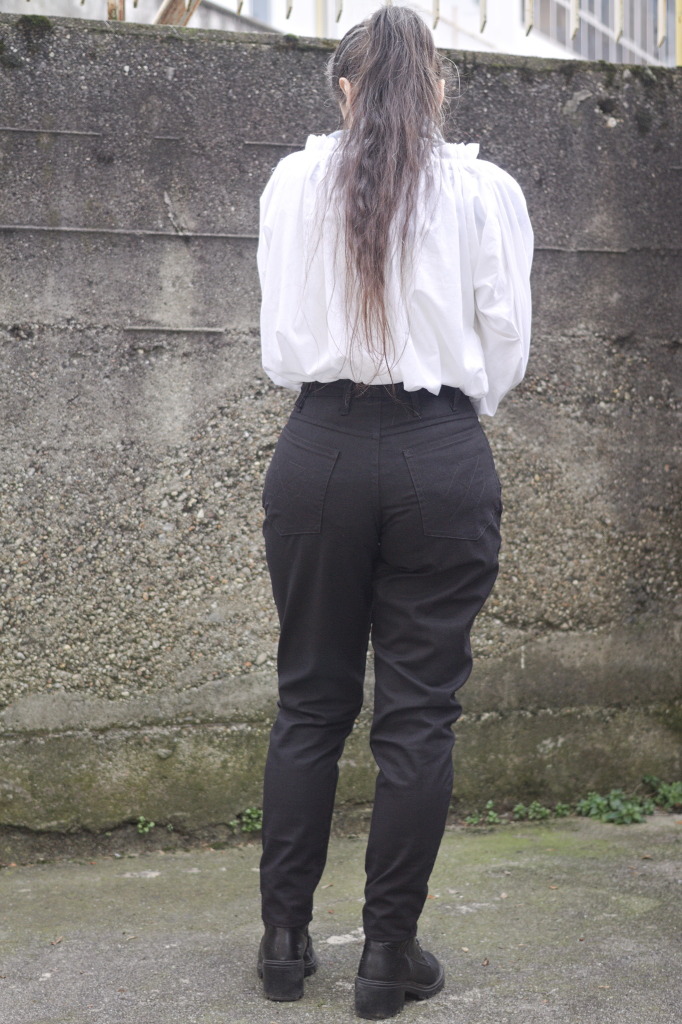
Making also went smoothly, and the result was fitting. Very fitting. A big too fitting, and the standard bum adjustment of the back was just enough for what apparently still qualifies as a big bum, so I adjusted the pattern to be able to add a custom amount of ease in a few places.
But at least I had a pair of jeans-shaped trousers that fit!
Except, at 200 g/m² I can’t say that fabric is the proper weight for a pair of trousers, and I may have looked around online1 for some denim, and, well, it’s 2024, so my no-fabric-buy 2023 has not been broken, right?
Let us just say that there may be other jeans-related posts in the near future.
- I had already asked years ago for denim at my local fabric shops, but they don’t have the proper, sturdy, type I was looking for.↩︎
https://blog.trueelena.org/blog/2024/02/19-jeans_step_one/index.html

A Corset or Two
Posted on January 7, 2024
Tags: madeof:atoms, craft:sewing, period:victorian, FreeSoftWear
CW for body size change mentions
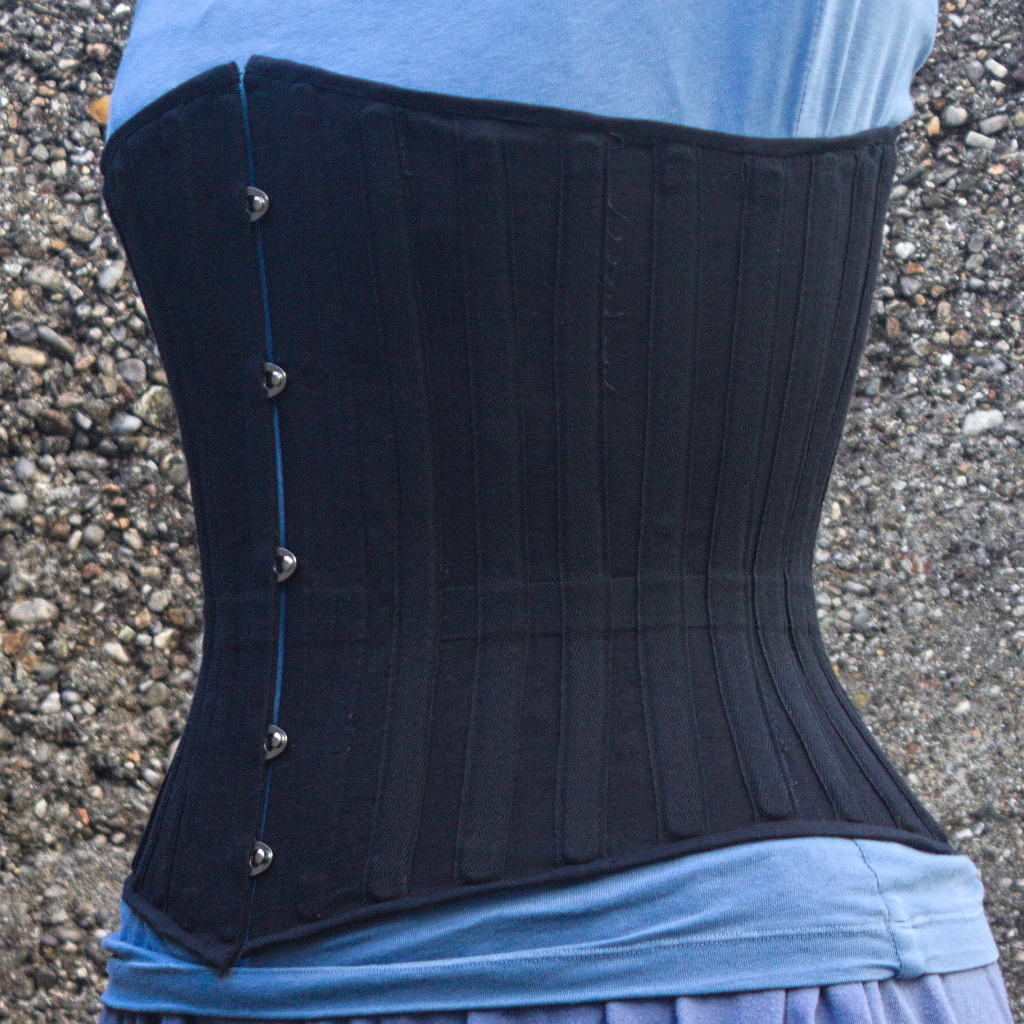
I needed a corset, badly.
Years ago I had a chance to have my measurements taken by a former professional corset maker and then a lesson in how to draft an underbust corset, and that lead to me learning how nice wearing a well-fitted corset feels.
Later I tried to extend that pattern up for a midbust corset, with success.
And then my body changed suddenly, and I was no longer able to wear either of those, and after a while I started missing them.
Since my body was still changing (if no longer drastically so), and I didn’t want to use expensive materials for something that had a risk of not fitting after too little time, I decided to start by making myself a summer lightweight corset in aida cloth and plastic boning (for which I had already bought materials). It fitted, but not as well as the first two ones, and I’ve worn it quite a bit.
I still wanted back the feeling of wearing a comfy, heavy contraption of coutil and steel, however.
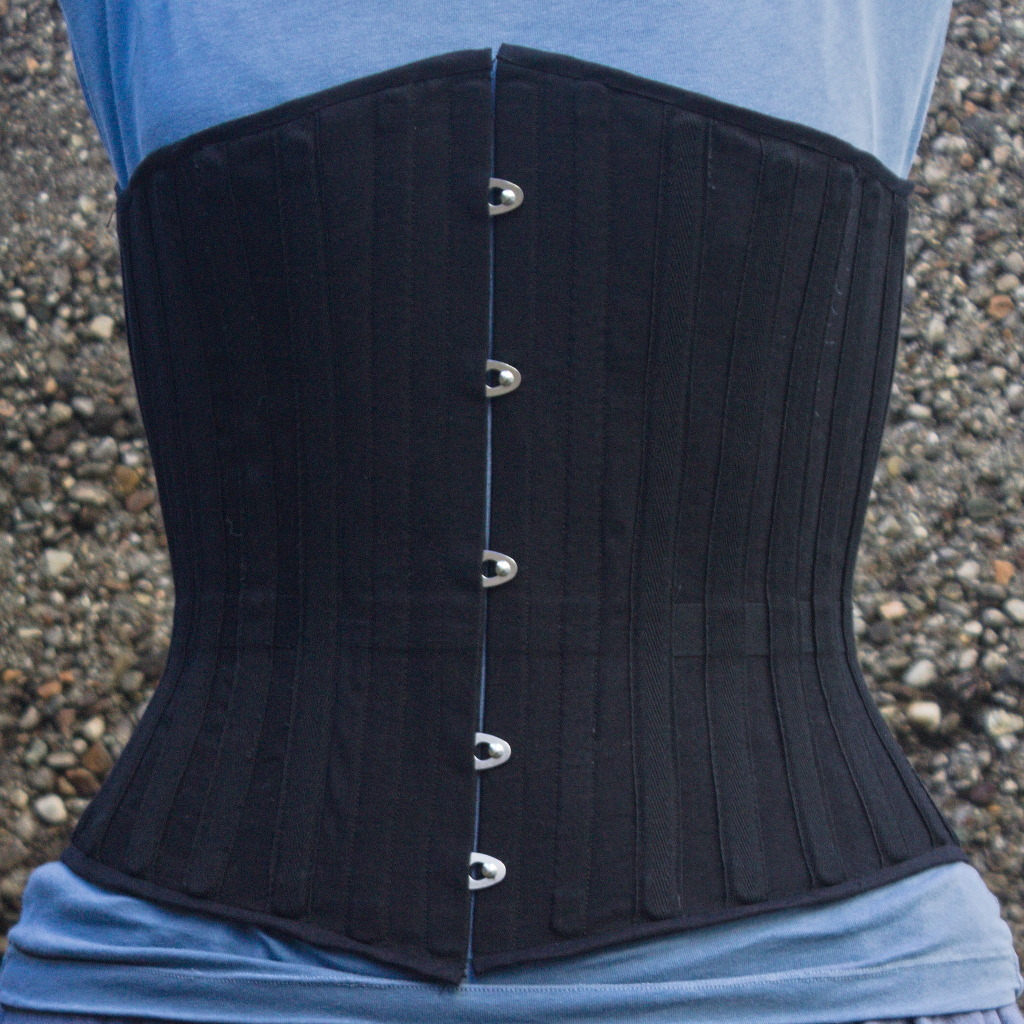
After a lot of procrastination I redrafted a new pattern, scrapped everything, tried again, had my measurements taken by a dressmaker [#dressmaker], put them in the draft, cut a first mock-up in cheap cotton, fixed the position of a seam, did a second mock-up in denim [#jeans] from an old pair of jeans, and then cut into the cheap herringbone coutil I was planning to use.
And that’s when I went to see which one of the busks in my stash would work, and realized that I had used a wrong vertical measurement and the front of the corset was way too long for a midbust corset.
Luckily I also had a few longer busks, I basted one to the denim mock up and tried to wear it for a few hours, to see if it was too long to be comfortable. It was just a bit, on the bottom, which could be easily fixed with the Power Tools1.
Except, the more I looked at it the more doing this felt wrong: what I needed most was a midbust corset, not an overbust one, which is what this was starting to be.
I could have trimmed it down, but I knew that I also wanted this corset to be a wearable mockup for the pattern, to refine it and have it available for more corsets. And I still had more than half of the cheap coutil I was using, so I decided to redo the pattern and cut new panels.
And this is where the “or two” comes in: I’m not going to waste the overbust panels: I had been wanting to learn some techniques to make corsets with a fashion fabric layer, rather than just a single layer of coutil, and this looks like an excellent opportunity for that, together with a piece of purple silk that I know I have in the stash. This will happen later, however, first I’m giving priority to the underbust.
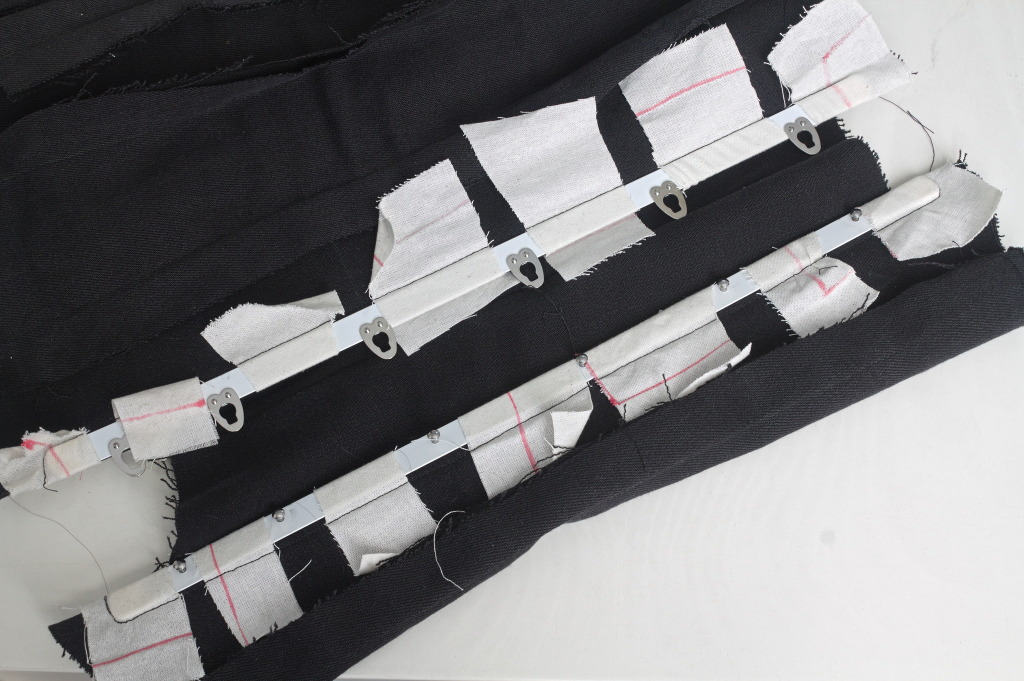
Anyway, a second set of panels was cut, all the seam lines marked with tailor tacks, and I started sewing by inserting the busk.
And then realized that the pre-made boning channel tape I had was too narrow for the 10 mm spiral steel I had plenty of. And that the 25 mm twill tape was also too narrow for a double boning channel. On the other hand, the 18 mm twill tape I had used for the waist tape was good for a single channel, so I decided to put a single bone on each seam, and then add another piece of boning in the middle of each panel.
Since I’m making external channels, making them in self fabric would have probably looked better, but I no longer had enough fabric, because of the cutting mishap, and anyway this is going to be a strictly underwear only corset, so it’s not a big deal.
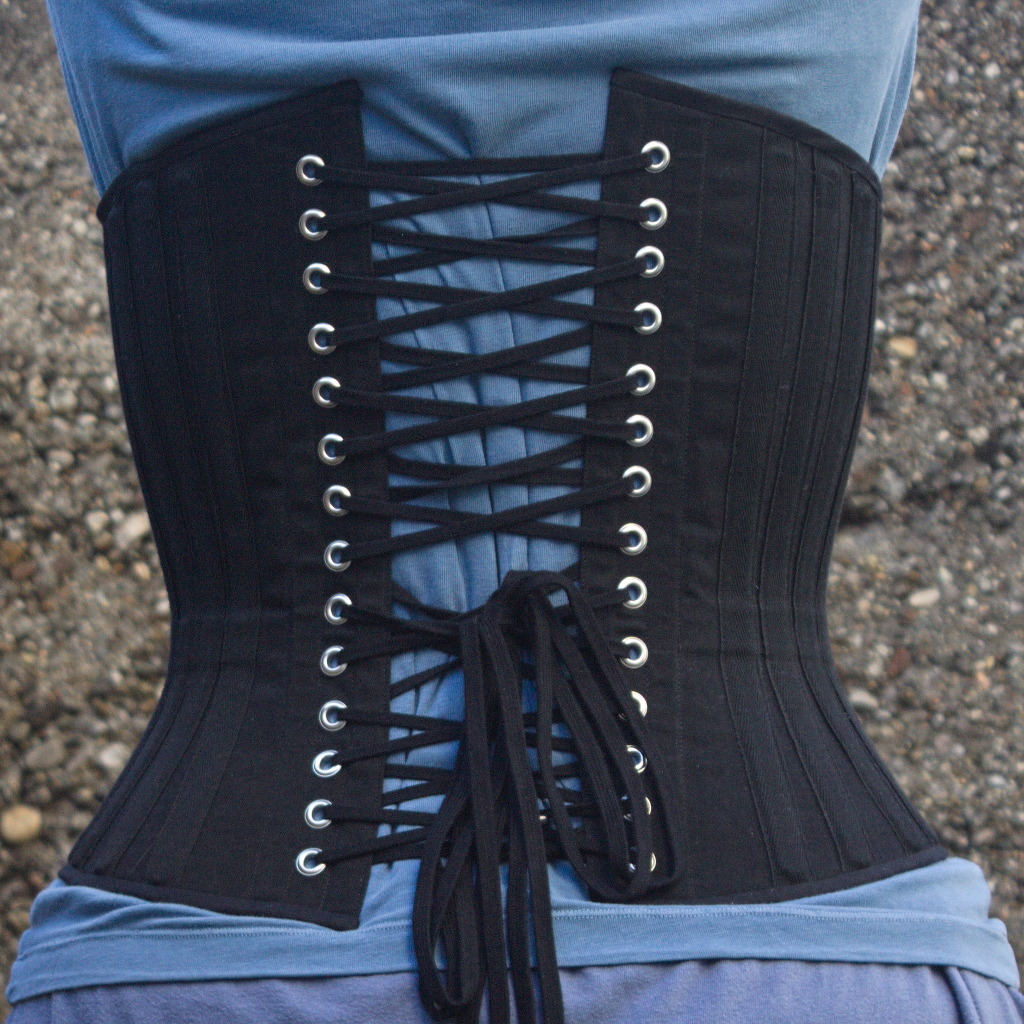
Once the boning channel situation was taken care of, everything else proceeded quite smoothly and I was able to finish the corset during the Christmas break, enlisting again my SO to take care of the flat steel boning while I cut the spiral steels myself with wire cutters.
I could have been a bit more precise with the binding, as it doesn’t align precisely at the front edge, but then again, it’s underwear, nobody other than me and everybody who reads this post is going to see it and I was in a hurry to see it finished. I will be more careful with the next one.
I also think that I haven’t been careful enough when pressing the seams and applying the tape, and I’ve lost about a cm of width per part, so I’m using a lacing gap that is a bit wider than I planned for, but that may change as the corset gets worn, and is still within tolerance.
Also, on the morning after I had finished the corset I woke up and realized that I had forgotten to add garter tabs at the bottom edge. I don’t know whether I will ever use them, but I wanted the option, so maybe I’ll try to add them later on, especially if I can do it without undoing the binding.
The next step would have been flossing, which I proceeded to postpone until I’ve worn the corset for a while: not because there is any reason for it, but because I still don’t know how I want to do it :)
What was left was finishing and uploading the pattern and instructions, that are now on my sewing pattern websiteas #FreeSoftWear, and finally I could post this on the blog.
- i.e. by asking my SO to cut and sand it, because I’m lazy and I hate doing that part :D↩︎
https://blog.trueelena.org/blog/2024/01/08-a_corset_or_two/index.html

Crescent Shawl
Posted on January 2, 2024
One of the knitting projects I’m working on is a big bottom-up triangular shawl in less-than-fingering weight yarn (NM 1/15): it feels like a cloud should by all rights feel, and I have good expectations out of it, but it’s taking forever and a day.
And then one day last spring I started thinking in the general direction of top-down shawls, and decided I couldn’t wait until I had finished the first one to see if I could design one.
For my first attempt I used an odd ball of 50% wool 50% plastic I had in my stash and worked it on 12 mm tree trunks, and I quickly made something between a scarf and a shawl that got some use during the summer thunderstorms when temperatures got a bit lower, but not really cold. I was happy with the shape, not with the exact position of the increases, but I had ideas for improvements, so I just had to try another time.
Digging through the stash I found four balls of Drops Alpaca in two shades of grey: I had bought it with the intent to test its durability in somewhat more demanding situations (such as gloves or even socks), but then the LYS1 no longer carries it, so I might as well use it for something a bit more one-off (and when I received the yarn it felt so soft that doing something for the upper body looked like a better idea anyway).
I decided to start working in garter stitch with the darker colour, then some garter stitch in the lighter shade and to finish with yo / k2t lace, to make the shawl sort of fade out.
The first half was worked relatively slowly through the summer, and then when I reached the colour change I suddenly picked up working on it and it was finished in a couple of weeks.
looks denser in a nice way, but the the lace border is scrunched up.
Then I had doubts on whether I wanted to block it, since I liked the soft feel, but I decided to try it anyway: it didn’t lose the feel, and the look is definitely better, even if it was my first attempt at blocking a shawl and I wasn’t that good at it.
I’m glad that I did it, however, as it’s still soft and warm, but now also looks nicer.
The pattern is of course online as #FreeSoftWear on my fiber craft patterns website.
- at least local to somebody: I can’t get to a proper yarn shop by foot, so I’ve bought this yarn online from one that I could in theory reach on a day trip, but it has not happened yet.↩︎
https://blog.trueelena.org/blog/2024/01/02-crescent_shawl/index.html

Some of you may remember that last year I have been #handsewing a shirt in red wool, but by the time I've mostly¹ finished it it was already too warm to be able to wear it significantly.
At least, the Sensible Season seems to have started, and I can wear it!
There will be a blog post. At some unknown time in the future.
¹ it does need a few detachable collar and cuffs variants, to style it a bit differently, but those don't prevent me from wearing the shirt as is.

Elastic Neck Top
Since some time I’ve been thinking about making myself a top or a dress with a wide gathered neckline that can be work at different widths, including off-the-shoulders.
A few years ago I’ve been gifted a cut of nice, thin white fabric with a print of lines and lozenges that isn’t uniform along the fabric, but looks like it was designed for some specific garment, and it was waiting in my stash for a suitable pattern.
And a few days ago, during a Sunday lunch, there was an off-hand mention of a dress from the late 1970s which had an elastic in the neckline, so that it could be optionally worn off-the-shoulders.
And something snapped in place.
I had plans for that afternoon, but they were scrapped, and I started to draw, measure, cut rectangles of fabric, pin and measure again, cut more fabric.
two rectangular tubes for the sleeves laid so that they meet the body just at the corners, and a triangle (a square gusset folded on the diagonal) joins them to the body.
I decided on a pattern made of rectangles to be able to use as much fabric as possible, with the size of each rectangle based mostly on the various sections on the print of the fabric.
I’ve made the typical sleeves from a rectangle and a square gusset, and then attached them to the body just from the gusset to keep the neckline wide and low.
The part of the fabric with large vertical stripes had two different widths: I could have made the back narrower, but I decided to just keep a strip with narrower lines to one side.
The fabric also didn’t have a full second strip of lozenges, so I had to hem it halfway through it.
The casing for the elastic was pieced from various scraps, but at least I was able to match the lines on the center front and back, even if they are different. Not that it matters a lot, since it’s all hidden in the gathering, but I would have known.
And since I was working on something definitely modern, even if made out of squares and rectangles, of course I decided to hand-sew everything, mostly to be able to use quite small sewing allowances, since the fabric was pretty thin.
In my stash I had a piece of swimsuit elastic that feels nice, looks nice and makes a knot that doesn’t slip, so I used it. It’s a perfect match, except for the neon yellow colour, which I do like, but maybe is a bit too high visibility? I will see if the haberdasher has the same elastic in dark blue, but right now this will do.
It was a quick project anyway: by the end of the working week the top was finished; I think that on a sewing machine it would be easy to make it in a day.
And it can be worn off the shoulders! Which is something I will probably never do in public (and definitely not outdoors), but now if I wanted I could! :D
As usual, the pattern (for what pattern there is) and instructions are on my pattern website under a #FreeSoftWear license, and I’ve also added to the site a tip on how I use electrician fish tape to thread things through long casings
https://blog.trueelena.org/blog/2023/07/26-elastic_neck_top/index.html

Late Victorian Combinations
Some time ago, on an early Friday afternoon our internet connection died. After a reasonable time had passed we called the customer service, they told us that they would look into it and then call us back.
On Friday evening we had not heard from them, and I was starting to get worried. At the time in the evening when I would have been relaxing online I grabbed the first Victorian sewing-related book I found on my hard disk and started to read it.
For the record, it wasn’t actually Victorian, it was Margaret J. Blair. System of Sewing and Garment Drafting. from 1904, but I also had available for comparison the earlier and smaller Margaret Blair. System of Garment Drafting. from 1897.
Anyway, this book had a system to draft a pair of combinations (chemise top + drawers); and months ago I had already tried to draft a pair from another system, but they didn’t really fit and they were dropped low on the priority list, so on a whim I decided to try and draft them again with this new-to-me system.
Around 23:00 in the night the pattern was ready, and I realized that my SO had gone to sleep without waiting for me, as I looked too busy to be interrupted.
The next few days were quite stressful (we didn’t get our internet back until Wednesday) and while I couldn’t work at my day job I didn’t sew as much as I could have done, but by the end of the week I had an almost complete mockup from an old sheet, and could see that it wasn’t great, but it was a good start.
One reason why the mockup took a whole week is that of course I started to sew by machine, but then I wanted flat-felled seams, and felling them by hand is so much neater, isn’t it?
And let me just say, I’m grateful for the fact that I don’t depend on streaming services for media, but I have a healthy mix of DVDs and stuff I had already temporary downloaded to watch later, because handsewing and being stressed out without watching something is not really great.
Anyway, the mockup was a bit short on the crotch, but by the time I could try it on and be sure I was invested enough in it that I decided to work around the issue by inserting a strip of lace around the waist.
And then I went back to the pattern to fix it properly, and found out that I had drafted the back of the drawers completely wrong, making a seam shorter rather than longer as it should have been. ooops.
I fixed the pattern, and then decided that YOLO and cut the new version directly on some lightweight linen fabric I had originally planned to use in this project.
The result is still not perfect, but good enough, and I finished it with a very restrained amount of lace at the neckline and hems, wore it one day when the weather was warm (loved the linen on the skin) and it’s ready to be worn again when the weather will be back to being warm (hopefully not too soon).
The last problem was taking pictures of this underwear in a way that preserves the decency (and it even had to be outdoors, for the light!).
This was solved by wearing leggings and a matched long sleeved shirt under the combinations, and then promptly forgetting everything about decency and, well, you can see what happened.
The pattern is, as usual, published on my pattern website as #FreeSoftWear.
And then, I started thinking about knits.
In the late Victorian and Edwardian eras knit underwear was a thing, also thanks to the influence of various aspects of the rational dress movement; reformers such as Gustav Jäger advocated for wool underwear, but mail order catalogues from the era such as https://archive.org/details/cataloguefallwin00macy (starting from page 67) have listings for both cotton and wool ones.
From what I could find, back then they would have been either handknit at home or made to shape on industrial knitting machines; patterns for the former are available online, but the latter would probably require a knitting machine that I don’t currently1 have.
However, this is underwear that is not going to be seen by anybody2, and I believe that by using flat knit fabric one can get a decent functional approximation.
In The Stash I have a few meters of a worked cotton jersey with a pretty comfy feel, and to make a long story short: this happened.
I suspect that the linen one will get worn a lot this summer (linen on the skin. nothing else need to be said), while the cotton one will be stored away for winter. And then maybe I may make a couple more, if I find out that I’m using it enough.
- cue ominous music. But first I would need space to actually keep and use it :)↩︎
- other than me, my SO, any costuming friend I may happen to change in the presence of, and everybody on the internet in these pictures.↩︎
https://blog.trueelena.org/blog/2023/05/26-late_victorian_combinations/index.html

Hiking Slippers
When I travel for a few days I don’t usually1 bring any other shoe than the ones I’m wearing, plus some kind of slippers for use inside hotel / B&B rooms.
It’s good for not carrying useless weight, but it always leave me with a vague feeling of “what if my only shoes break”, followed by “on a Sunday, when the shops are closed”.
So I started to think in the general direction of hiking sandals, shoes that are designed to be worn when resting, and lightweight to carry, but are a passable substitute for regular shoes in case of an accident to the main ones, maybe with the help of an extra pair of socks2 (or when crossing fords, but that’s not really a usecase I have).
My requirements are easier than the ones for real hiking sandals, since I’m only going to be walking on paved streets (or at most easy unpaved ones), and the weight considerations are a thing, but not as strict as if I had to carry these on my back while hiking many hours in a day.
My first attempt was a pair of hiking sandals from things I already had in my stash, with vibram soles, neoprene padding and polyester webbing. After a couple fixes they sort of worked, but they had a few big issues.
- While comfortable when worn, the neoprene made the sandals hard to make, as it tended to deform while being assembled.
- Polyester webbing is slippery. Some strips of hot glue in strategical places helped, but they weren’t perfect and in time they are peeling off.
- Most importantly, to make the sandals stable enough to wear while walking I had to add a strap around the ankle that needs closing: this makes it a bit of a hassle to use the sandals, say, when waking up in the middle of the night for metabolic reasons.
This was also readily attainable from the stash: some polycotton for the sole lining, elastic mesh for the uppers, EVA foam for padding and vibram soles.
I decided to assemble most of them by machine, and it was quick and painless (possibly also thanks to the elasticity of the mesh)
For the soles I may have gone a bit overboard with the vibram claw, but:
- I already had it in the stash;
- if I need to wear them on an unpaved road, they are going to be suitable;
- why not?
As for the finished weight, at 235 g for the pair I thought I could do better, but apparently shoes are considered ultralight if they are around 500 g? Using just one layer of mesh rather than two would probably help, but it would have required a few changes to the pattern, and anyway I don’t really to carry them around all day.
I’ve also added a loop of fabric (polycotton) to the centre back to be able to hang the slippers to the backpack when wet or dirty; a bit of narrow webbing may have been better, but I didn’t have any in my stash.
The pattern is the same as that used for the linen slippers, and of course it’s released as #FreeSoftWear.
I’ve worn these for a few days around the home and they worked just fine, except for the fact that I had to re-glue the sole in a few places (but I suspect it was glued badly in the first place, since the other sole had no issues).
Right now I have no plans to travel, so I don’t know how much I will be able to test these in the next few months, but sooner or later I will (or I’ll keep wearing them at home after I’ve thoroughly tested the linen ones), and if there are issues I will post them here on the blog (and add a link to this post).
- the exception would be when I’m also bringing some kind of costume, and even there it’s not always true.↩︎
- and one should always carry an extra pair of clean socks, as they are useful for so many things, as Pratchett reminds us.↩︎
https://blog.trueelena.org/blog/2023/05/05-hiking_slippers/index.html

Linen Slippers
I hate going out to buy shoes. Even more so I hate buying home shoes, which is what I spend most of my life in, also because no matter what I buy they seem to disintegrate after a season or so. So, obviously, I’ve been on a quest to make my own.
As a side note, going barefoot (with socks) would only move the wear issue to the socks, so it’s not really a solution, and going bare barefoot on ceramic floors is not going to happen, kaythanksbye.
For the winter I’m trying to make knit and felted slippers; I’ve had partial success, and they should be pretty easy to mend (I’ve just had to do the first mend, with darning and needle felting, and it seems to have worked nicely).
For the summer, I’ve been thinking of something sewn, and with the warm season approaching (and the winter slippers needing urgent repairs) I decided it was time to work on them.
I already had a shaped (left/right) pattern for a sole from my hiking sandals attempts (a topic for another post), so I started by drafting a front upper, and then I started to have espadrille feeling and decided that a heel guard was needed.
As for fabric, looking around in the most easily accessible part of the Stash I’ve found the nice heavyweight linen I’m using for my Augusta Stays, of which I still have a lot and which looked almost perfect except for one small detail: it’s very white.
I briefly thought about dyeing, but I wanted to start sewing NOW to test the pattern, so, yeah, maybe it will happen one day, or maybe I’ll have patchy dust-grey slippers. If I’ll ever have a place where I can do woad dyeing a blue pair will happen, however.
Contrary to the typical espadrillas I decided to have a full lining, and some padding between the lining and the sole, using cotton padding leftovers from my ironing board.
To add some structure I also decided to add a few rows of cording (and thus make the uppers in two layers of fabric), to help prevent everything from collapsing flat.
As for the sole, that’s something that is still causing me woes: I do have some rubber sole sheets (see “hiking sandals” above), but I suspect that they require glueing, which I’m not sure would work well with the natural fabric uppers and will probably make repairs harder to do.
In the past I tried to make some crocheted rope soles and they were a big failure: they felt really nice on the foot, but they also self-destroyed in a matter of weeks, which is not really the kind of sole I’m looking for.
Now I have some ~ 3 mm twine that feels much harsher on the hands while working it (and would probably feel harsher on the feet, but that’s what the lining and padding are for), so I hope it may be a bit more resistant, and I tried to make a braided rope sole.
Of course, I have published the pattern and instructions for the slippers as well as those for the braided rope sole as #FreeSoftWear.
Now what is left is trying everything under daily use, and I hope I will have updates on this at the end of the season, rather than soon :D
https://blog.trueelena.org/blog/2023/05/04-linen_slippers/index.html

This website uses cookies to recognize revisiting and logged in users. You accept the usage of these cookies by continue browsing this website.
